
Context
Our team has experimented with Hashicorp Vault as our new credentials management solution. Thanks to the official Vault Helm Chart, we could get a production-ready vault cluster running on Kubernetes—with minimal effort.
Architecture
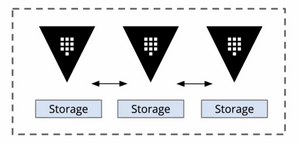
Our 5-node vault cluster is highly available by using the provided Integrated Storage Raft backend. The statefulset and persistent volume claims allow each node to have its own data storage, which offers backups and redundancy for our database.
The Problem
Unfortunately, the open-source version of Vault does not offer an out-of-the-box automated backup solution, and it is only available in Vault Enterprise.
While the backup feature is no longer automated, Vault can still access it through CLI and HTTP API. We use a CronJob that runs alongside our Vault Kubernetes deployment to trigger snapshot saves every few minutes—a manual version of the old automatic configuration.
How?
Prerequisite
- You have a working vault cluster
- You have sufficient access to the cluster
- You have an operating S3 storage instance
Setup Policy and Authentication
Configure the snapshot agent with a minimal backup policy.
echo '
path "sys/storage/raft/snapshot" {
   capabilities = ["read"]
}' | vault policy write snapshot -
The app-role authentication method allows applications or machines to authenticate with Vault using roles defined by the administrator.
The AppRole authentication method is a perfect fit for the Snapshot Agent, which will be used to connect to our Vault cluster. Copy down both the role ID and secret ID - you will need them later!
vault auth enable approle
vault write auth/approle/role/snapshot-agent token_ttl=2h token_policies=snapshot
vault read auth/approle/role/snapshot-agent/role-id -format=json | jq -r .data.role_id
vault write -f auth/approle/role/snapshot-agent/secret-id -format=json | jq -r .data.secret_id
Prepare Secrets
Let's save the sensitive information we gathered as secrets. We will use them later.
apiVersion: v1
kind: Secret
metadata:
  name: vault-snapshot-agent-token
type: Opaque
data:
  # we use gotmpl here
  # you can replace them with base64-encoded value
  VAULT_APPROLE_ROLE_ID: {{ .Values.approle.secretId | b64enc | quote }}
  VAULT_APPROLE_SECRET_ID: {{ .Values.approle.secretId | b64enc | quote }}
apiVersion: v1
kind: Secret
metadata:
  name: vault-snapshot-s3
type: Opaque
data:
  # we use gotmpl here
  # you can replace them with base64-encoded value
  AWS_ACCESS_KEY_ID: {{ .Values.backup.accessKeyId | b64enc | quote }}
  AWS_SECRET_ACCESS_KEY: {{ .Values.backup.secretAccesskey | b64enc | quote }}
  AWS_DEFAULT_REGION: {{ .Values.backup.region | b64enc | quote }}
The CronJob
Let's define the CronJob that does all the actual work.
We configure the VAULT_ADDR environment variable to http://vault-active.vault.svc.cluster.local:8200. Using vault-active Service can ensure the snapshot request is made against the leader node, assuming you have enabled Service Registration, which is the default. The URL may vary depending on your vault helm chart deployment release name and target namespace.
I overcomplicated the cronjob by using multiple containers to perform a simple backup and upload task. The intention was to avoid building custom images, and I don't want another image that needs maintenance.
apiVersion: batch/v1
kind: CronJob
metadata:
  name: vault-snapshot-cronjob
spec:
  schedule: "@every 12h"
  jobTemplate:
    spec:
      template:
        spec:
          volumes:
          - name: share
            emptyDir: {}
          containers:
          - name: snapshot
            image: vault:1.7.2
            imagePullPolicy: IfNotPresent
            command:
            - /bin/sh
            args:
            - -ec
            # The offical vault docker image actually doesn't come with `jq`. You can
            # - install it during runtime (not a good idea and your security team may not like it)
            # - ship `jq` static binary in a standalone image and mount it using a shared volume from `initContainers`
            # - build your custom `vault` image
            - |
              curl -sS https://webinstall.dev/jq | sh
              export VAULT_TOKEN=$(vault write auth/approle/login role_id=$VAULT_APPROLE_ROLE_ID secret_id=$VAULT_APPROLE_SECRET_ID -format=json | /jq/jq -r .auth.client_token);
              vault operator raft snapshot save /share/vault-raft.snap;
            envFrom:
            - secretRef:
                name: vault-snapshot-agent-token
            env:
            - name: VAULT_ADDR
              valut: http://vault-active.vault.svc.cluster.local:8200
            volumeMounts:
            - mountPath: /share
              name: share
          - name: upload
            image: amazon/aws-cli:2.2.14
            imagePullPolicy: IfNotPresent
            command:
            - /bin/sh
            args:
            - -ec
            # the script wait untill the snapshot file is available
            # then upload to s3
            # for folks using non-aws S3 like IBM Cloud Object Storage service, add a `--endpoint-url` option
            # run `aws --endpoint-url <https://your_s3_endpoint> s3 cp ...`
            # change the s3://<path> to your desired location
            - |
              until [ -f /share/vault-raft.snap ]; do sleep 5; done;
              aws s3 cp /share/vault-raft.snap s3://vault/vault_raft_$(date +"%Y%m%d_%H%M%S").snap;
            envFrom:
            - secretRef:
                name: vault-snapshot-s3
            volumeMounts:
            - mountPath: /share
              name: share
          restartPolicy: OnFailure
Wrapping Up
You now have all the resources needed to automate vault backup for the Raft backend. You can just run kubectl apply -f * or build your own Helm Chart and distribute it internally on whatever chart repository you use.